
VitePress just released v1.0.0 a couple of days ago, what a great opportunity to try it out! It's fronted as a tool to make documentation, but should work great for a tech-blog as well.
This article is mainly about installing and setting up VitePress, but with a good bit of customization.
Install and scaffold VitePress
https://vitepress.dev/guide/getting-started
# Make some directories
$ mkdir -p ~/code/codeberg/abc.fractalf.net
$ cd ~/code/codeberg/abc.fractalf.net

# Install VitePress
$ npm add -D vitepress
$ npx vitepress init

# Init git
$ echo "node_modules\n.vitepress/cache\n.vitepress/dist" > .gitignore
$ git init -b main
$ git config user.name "fractalf"
$ git config user.email "fractalf@noreply.codeberg.org"
$ git add .
$ git commit -vm "Init"

# Boot it up
$ npm run docs:dev
Bom!
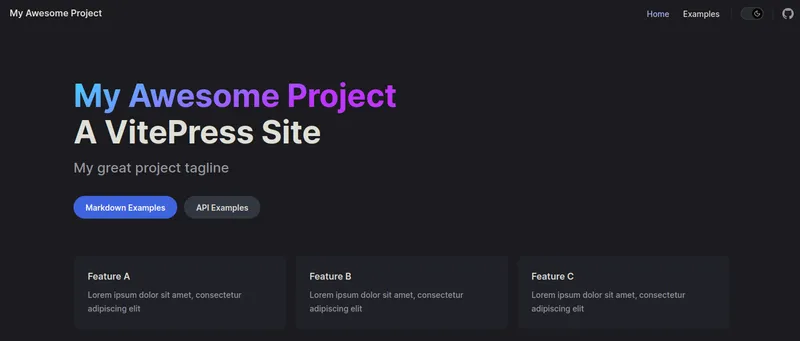
..and the basics are up on http://localhost:5173
Before I started working on the customization I quickly changed the default npm run cli commands, 'cause I knew I was going to type them a lot.
  ..
  "scripts": {
    "dev": "vitepress dev",
    "build": "vitepress build",
    "preview": "vitepress preview"
  },
  ..
Now lets do some real stuff..
First article
VitePress out of the box looks amazing and comes with lots of usefull stuff.
However, I wanted a pretty plain blog-ish setup to begin with so the first thing I did was to remove some of that stuff. Maybe later I'll add some of it back again, we'll see.
I'm gonna start out with a directory structure like this
/articles/001-vitepress-as-a-blog
/articles/002-<title>
/articles/003-<title>
..
'cause I'll never write more than 999 articles right?
"640K ought to be enough for anybody"
I wrote this article during a couple of evenings while tweaking and customizing VitePress.
Customization
It's pretty easy to extend/overwrite the default theme and the documentation is pretty good. Most of the stuff I wanted to do I could figure out within reasonable time, but a couple of things had me digging deep.
Colors
I wanted some other colors on the front page big font, and after some mucking about I found out this is defined in the .vitepress/theme/style.css file. So I copied some colours from a drawing my 7 year old daughter drew and made new gradient.
:root {
  --vp-home-hero-name-background: -webkit-linear-gradient(
    0deg,
    #7632aa,
    #209ae6,
    #469e39,
    #CBBB4C,
    #aa7e04
  );
}
I also thought the color for <code> and <a> was too similar, so I wanted to change one of them. When overriding inherited CSS it's important to get the exact rule string right, unless you want to mess about with the ugly !important (you don't).
- Open the inspector in the browser
- Find the CSS rule that belongs to the tag
- Click the source link to get to where the rule is defined
- Copy/paste the CSS rule to
.vitepress/theme/style.css
.vp-doc :not(pre, h1, h2, h3, h4, h5, h6) > code {
  color: #cab94a;
}
There, now it's much easier to visually distinguish links from code.
Social links
In VitePress you can define social links in the .vitepress/config.mjs file. It comes default like this (src)
socialLinks: [
    { icon: 'github', link: 'https://github.com/vuejs/vitepress' }
]
I'm not much of a fan of "big corp" (to put it mildly) and thought it was a sad day when Microsoft bought Github.
Luckily Codeberg came along after a while and now I host all my new public code there. Great service by great people!
Codeberg is powered by Forgejo (a proper Gitea fork) which they also maintain. I've been selfhosting it for quite some years and it's really nice!
Unfortunately there was no Codeberg icon in VitePress by default, so I set out to figure out how to fix it in a proper way.
VitePress uses this code to show an icon (src)
<span class="vpi-social-${props.icon}" />and the css looks like this (src)
.vpi-social-mastodon {
  --icon: url("data:image/svg+xml,%3Csvg..");
}
So I did this
- Got the Codeberg logo: https://design.codeberg.org/logo-kit/icon_inverted.svg
- Optimized it: https://devina.io/svg-minifier
- Turn off
Convert path data - Turn off
Convert transform
- Turn off
- URL encoded it: https://www.urlencoder.io/
- Added the encoded svg to
.vitepress/theme/style.css
/* .vitepress/theme/style.css */
.vpi-social-codeberg {
  --icon: url("data:image/svg+xml,%3Csvg..")
}// .vitepress/config.mjs
socialLinks: [
{ icon: 'mastodon', link: 'https://freeradical.zone/@alf' },
{ icon: 'codeberg', link: 'https://codeberg.org/fractalf' },
]which worked great! You can see the Codeberg icon in the upper right corner of this site.
Tailwind
I used to hate Tailwind with a passion, but I guess it grew on me. Now I like to have it available if I wanna do some quick tweaks. I don't mind mixing it with scoped component styling, just keep things tidy and you'll be fine.
# Install dependencies
$ npm install -D tailwindcss postcss autoprefixer
Create a new file tailwind.config.js with the following
module.exports = {
    content: [
        '.vitepress/**/*.{js,ts,vue}',
        './articles/**/*.md',
    ],
}
Create a new file .vitepress/theme/tailwind.postcss with the following
@tailwind base;
@tailwind components;
@tailwind utilities;
Add the following to .vitepress/theme/index.js
import './tailwind.postcss'Voilà
List articles automatically
Listing all the articles manually in the index.md as features works, but is way too much labour and doesn't scale pretty good. Let's use data loading instead, or more spesifically createcontentloader()
Create a new file data/articles.data.js with the following
import { createContentLoader } from 'vitepress'
export default createContentLoader('/articles/**/*.md')
The above returns an array of objects, each containing the url to the article and the frontmatter data assosiated with it.
[
  {
    "frontmatter": {
      "id": "001",
      "title": "VitePress as a blog",
      "description": "Installing and setting up VitePress from scratch to use as a blog",
      "created": "23-03-2024",
      "tags": [
        "code",
        "vitepress",
        "vue"
      ],
      "outline": "deep",
    },
    "url": "/articles/001-vitepress-as-a-blog/"
  },
]
Then use it like this in a Vue component (see below) to list the articles as you please.
<script setup>
import { data } from '/data/articles.data.js'
..
</script>
REMEMBER to have "type": "module" in the package.json or you'll get an error.
Vue components
I liked the default way features worked, but wanted more controll over it so I used the logic from these core files as a base for my own custom components.
VPHomeFeatures.vueVPFeatures.vueVPFeature.vue
The files can be found in the VitePress core components directory
I simplefied a little and only made these two files
VPArticles.vueVPArticle.vue
<!-- VPArticles.vue (simplified for the purpose of this example) -->
<script setup>
import { data as articles } from '/data/articles.data.js'
import VPArticle from './VPArticle.vue'
</script>

<div v-for="data in articles" :key="data.frontmatter.id">
    <VPArticle
        :id="data.frontmatter.id"
        :title="data.frontmatter.title"
        :subtitle="data.frontmatter.subtitle"
        :description="data.frontmatter.description"
        :url="data.url"
        :image="data.frontmatter.image"
    />
</div>
Then you need to tell VitePress where to use this component by using layout slots.
// .vitepress/theme/index.js
import DefaultTheme from 'vitepress/theme'
import VPArticles from '../components/VPArticles.vue'

export default {
    Layout() {
        return h(DefaultTheme.Layout, null, {
            'home-features-before': () => h(VPArticles),
        })
    }
}
Header / Footer
I wanted each article (markdown file) to have a standard predefined header and footer. We can use tricks from earlier by injecting these in the correct places.
VitePress core component VPDoc.vue handles the markdown files. Inside of it I found two slots that would work for my goal
doc-beforedoc-footer-before
Extending the theme with two new custom components (as done before) I ended up with this
// .vitepress/theme/index.js
import DefaultTheme from 'vitepress/theme'
import VPArticles from '../components/VPArticles.vue'
import VPDocHeader from '../components/VPDocHeader.vue'
import VPDocFooter from '../components/VPDocFooter.vue'

export default {
    Layout() {
        return h(DefaultTheme.Layout, null, {
            'home-features-before': () => h(VPArticles),
            'doc-before': () => h(VPDocHeader),
            'doc-footer-before': () => h(VPDocFooter),
        })
    }
}
Then I can use the article frontmatter data inside the component for the header
<!-- VPDocHeader -->
<script setup>
import { useData, useRoute } from 'vitepress'

const { frontmatter: fm } = useData()
const route = useRoute()
</script>

<template>
    <div>
        <h1 class="text-3xl font-bold relative">
            {{ fm.title }}
            <span class="text-sm font-normal absolute right-0 mt-2 opacity-80">
                {{ fm.created }}
            </span>
        </h1>
        <div class="my-3">
            {{ fm.description }}
        </div>
        <img class="rounded-t-xl" :src="route.path + (fm.image || 'banner.jpg')">
    </div>
</template>
and for the footer.
<!-- VPDocFooter -->
<template>
<pre>
--
Thanks for reading!
Contact me on mastodon for questions/feedback
Until next time..
-Alf 😃
</pre>
</template>
For reference, this is how my frontmatter data looks
<!-- articles/001-vitepress-as-a-blog/index.md -->
---
id: '001'
title: VitePress as a blog
description: Installing and setting up VitePress (former VuePress) from scratch to use as a blog
created: 23-03-2024
tags:
    - code
    - vitepress
    - vue
outline: deep
---
Head meta tags
Lets add some meta tags by using the transformHead hook.
async transformHead({ pageData: pd}) {
    const isHome = pd.frontmatter.layout === 'home'
    return [
        ['meta', {
            name: 'og:title',
            content: isHome ? SITE_NAME : pd.title + ' | ' + SITE_NAME
        }],
        ['meta', {
            name: 'og:description',
            content: isHome ? SITE_DESC : pd.description
        }],
        ['meta', {
            name: 'og:image',
            content: SITE_URL + '/screenshot.png'
        }],
        ['meta', {
            name: 'og:image:alt',
            content: SITE_NAME
        }],
    ]
},
Image caption
I wanted to add a caption to images based on the title
That turned out to be a really deep rabbit hole.
First I thought it could be done with an extension of the image rule like this
// .vitepress/config.mjs
export default defineConfig({
    ..
    markdown: {
        config: md => {
            const _super = md.renderer.rules.image
            md.renderer.rules.image = function (tokens, idx, options, env, self) {
                let title = tokens[idx].attrs[2]
                if (title) {
                    title = title[1]
                    const src = tokens[idx].attrs[0][1]
                    const alt = tokens[idx].content
                    return `
                        <figure>
                            <img src="${src}" alt="${alt}" title="${title}" />
                            <figcaption align="center">
                                <small>${title}</small>
                            </figcaption>
                        </figure>`
                }
                return _super(tokens, idx, options, env, self)
            }
        }
    },
})
I was wrong. It seemed to work in dev mode, but when building for prod I had an error which resulted in some bad HTML.
Error: Hydration completed but contains mismatches
In an issue I made about this problem a suggestion came up to use third party plugin instad, so that's what I ended up doing, as well as extending it a little bit.
# https://github.com/Antonio-Laguna/markdown-it-image-figures
$ npm install -D markdown-it-image-figures// .vitepress/config.mjs
import imageFigures from 'markdown-it-image-figures'
..
export default defineConfig({
..
markdown: {
config: md => {
md.use(imageFigures, { figcaption: true })
// https://github.com/markdown-it/markdown-it/blob/master/docs/examples/renderer_rules.md
const proxy = (tokens, idx, options, env, self) => self.renderToken(tokens, idx, options)
// Extend the plugin and add <small> to <figcaption>
const defaultFigCaptionOpenRenderer = md.renderer.rules.figcaption_open || proxy;
const defaultSmallOpenRenderer = md.renderer.rules.small_open || proxy;
md.renderer.rules.figcaption_open = function(tokens, idx, options, env, self) {
const small = new Token("small_open", "small", 1);
small.attrs = [['style', 'opacity:0.8;']]
return `${defaultFigCaptionOpenRenderer(tokens, idx, options, env, self)}${defaultSmallOpenRenderer([small], 0, options, env, self)}`;
};
const defaultFigCaptionCloseRenderer = md.renderer.rules.figcaption_close || proxy;
const defaultSmallCloseRenderer = md.renderer.rules.small_close || proxy;
md.renderer.rules.figcaption_close = function(tokens, idx, options, env, self) {
const small = new Token("small_close", "small", -1);
return `${defaultSmallCloseRenderer([small], 0, options, env, self)}${defaultFigCaptionCloseRenderer(tokens, idx, options, env, self)}`;
};
}
},
})Initially I also had to dig pretty deep to figure out how to add this plugin to VitePress. The only thing I could find in the docs was this (src)
export default {
  markdown: {...}
}
Which wasn't too enlightening, so I hade to dive into the source code where I found this (src)
export interface MarkdownOptions extends MarkdownIt.Options {
  /* ==================== General Options ==================== */

  /**
   * Setup markdown-it instance before applying plugins
   */
  preConfig?: (md: MarkdownIt) => void
  /**
   * Setup markdown-it instance
   */
  config?: (md: MarkdownIt) => void
and later down in the same file this (src)
  // apply user config
  if (options.config) {
    options.config(md)
  }
Aha, so to work with markdown-it in VitePress you have to use the config property like this
// .vitepress/config.mjs
export default defineConfig({
    ..
    markdown: {
        config: md => {
            // Here I can do whatever I want with the markdown-it object
        }
    },
})
Troubleshooting
Images missing
The images was working fine when running npm run dev (dev mode), but for some reason the images in my custom components didn't load when running npm run build and npm run preview (prod mode).
I just couldn't make this work no matter how hard I tried, so I had to throw in the towel and get help from the pros. Here's the issue I made. The fine folks in the VitePress team was quick to respond (thanks Divyansh Singh).
That string is not statically analyzable. In dev it works because stuff outside public is also served and browsers resolve that during runtime. If you want it to work you'll either need to keep it in public or import that image and then pass it as prop. Importing in frontmatter is not supported though yet (it's planned but vite is missing certain public APIs).
Alternatively, you can write some script that copies non-markdown stuff to dist in buildEnd hook. But those assets won't be fingerprinted.
I want to keep the images close to the markdown files for simplicity, so using public/ is not really desirable. Using import to get images doesn't work as their paths are dynamically created.
That left me with the last option of using the buildEnd hook. Turned out to be pretty easy once I figured out how to do it. This code snippet copies the images to the correct directory in the .vitepress/dist.
// .vitepress/config.mjs
export default defineConfig({
    ..
    async buildEnd(siteConfig) {
        // Get each article (markdown with frontmatter data)
        const articles = await createContentLoader('/articles/**/*.md').load()
        for (const article of articles) {
            // article.url is the directory where I keep the images
            const image = article.frontmatter.image || 'banner.jpg'
            const src = __dirname + '/..' + article.url + image
            const dst = __dirname + '/dist' + article.url + image
            fs.copyFileSync(src, dst);
        }
    },
    ..
})